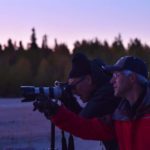
Camera tripod
Bring a tripod that is sturdy enough to hold your camera and lens up without movement.
The aurora borealis, or Northern Lights, should be on everyone’s bucket list to experience. If you’re spending the time and effort to travel to far destinations of the earth to see these lights, you will most likely want to capture images of your amazing experience. Here are some things to consider before you go.
Bring a tripod that is sturdy enough to hold your camera and lens up without movement.
Bring a lens cloth to clean and remove moisture from your lens. In cold temperatures, your camera lens will tend to fog if there is moisture in the air. You will want to check for this during the night.
Bring a small flash light to see controls on your camera in the dark. A headlamp is particularly useful, as it frees up your hands to adjust your camera.
If you own a pro to semi-pro or consumer digital SLR camera you will want to bring at least a 50 mm lens. The lower the f stop on the lens the better (i.e 50mm f2 lens but you can also use a 50mm f4 but your exposure will be slightly longer).*
Consider getting a remote control trigger for your SLR. Although it is not necessary, it ensures no movement during the exposure. Generally, if you are gentle when releasing the shutter you won’t get enough movement to affect the image capture.
Bring extra batteries. While one battery should be enough for doing some images, you may be taking images all night. If the temperatures are 30˚F – 40˚F (0˚C – 5˚C) the cold temperatures can drain your batteries faster. Keep your spare battery in your pant pocket to keep it warm.

*The longer the exposure the more the Northern Lights will move during the exposure causing them to blur slightly. Also, consider bringing a lens that is in the range of 12mm-24mm zoom and or a 24mm-70mm. This will give you the
ability to capture as much of the sky as you wish. (If you are unsure about f stops and lenses, check your camera manual or go to Nikon.com to learn more.)
By Anthony Arendt
Professional Cinematographer and Photographer
(Anthony is a successful Hollywood veteran with many major film and commercials projects to his credit, including the movie Avatar. He is a member of the Nikon pro-staff. Anthony and partner Rich Wedeking are on-staff with Ganglers and shot and produced the incredible Gangler’s Sub-Arctic video. You may even possibly meet him while at Ganglers! )
A steady tripod is a ‘must’ to shoot Northern Lights. (Ganglers has on hand a limited number of tripods for guests’ use or as a backup)
Use the best camera you can. The newer, bigger and better the camera sensor is, the better its low light capabilities will be. (Tony demoed the Nikon Z6 while at Ganglers)
A wide angle prime or zoom lens within the range of 14-40mm is best for maximum sky coverage.
On the day of, set your lens to infinity and mark it or make note where it is on the lens barrel or LED display. (On some lenses, infinity is not exactly where the infinity symbol lines up!)
A headlamp or flashlight that has red light is best while shooting so you don’t “pollute” other guests’ pictures. Turning on a normal flashlight while actively shooting can ruin the picture of anyone around you because of the long exposure times.
Most cameras have a time delay setting. Set it to 5 seconds so that when you depress the shutter, the camera has enough time to settle from your touching it.
Manually set your camera at ISO 1600, lens at f4 and shutter speed of 20 seconds. Take the picture, check the results.
You want to experiment with these 3 different settings, and judge by your own results. It’s a give and take. The longer the shutter speed the more blur you will get which can be really cool. Higher the ISO number, the more camera noise is introduced.
Relax, play with your settings, take your pics and enjoy the miracle
Your adventures here are an exclusive experience.
Each trip is designed to bring you a unique slice of the Sub-Arctic. Let us assist you in choosing your perfect adventure!
Stay up to date with all our news and specials through our spam free Newsletter.